
HP is one of the most popular printer brands, known for reliability and easy-to-use software. Setting up your HP printer can be done in just a few steps:
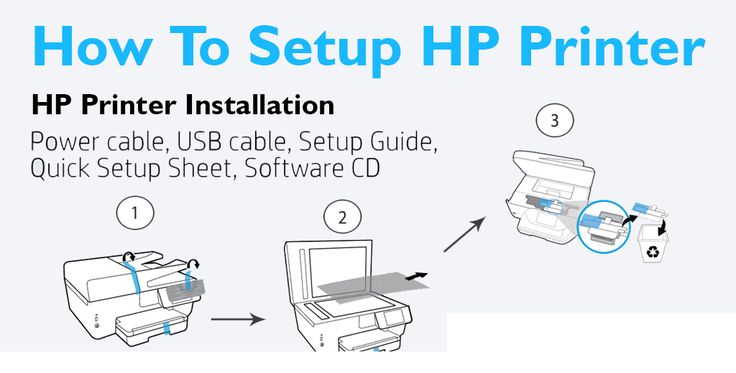
Step 1: Unpack and Prepare the Printer
-
Remove all packaging materials, including tapes and protective covers.
-
Place the printer on a flat surface near your computer and Wi-Fi router (if wireless).
Step 2: Install Ink Cartridges and Paper
-
Open the cartridge access door and insert the ink/toner cartridges.
-
Load A4 or letter-sized paper into the input tray.
Step 3: Power On and Connect
-
Plug in the printer and press the Power button.
-
For wireless setup, navigate to the printer’s Control Panel → Wireless Settings → Wi-Fi Setup Wizard.
-
Select your Wi-Fi network and enter the password.
Step 4: Install HP Smart App / Drivers
-
Download and install the HP Smart App (available on Windows, Mac, iOS, Android).
-
The app automatically detects your printer and guides you through setup.
-
Alternatively, download drivers from 123.hp.com.
Step 5: Print a Test Page
-
Once the printer is connected, try printing a test document to ensure everything works smoothly.
✅ Tip: If the wireless setup doesn’t work, you can connect via USB cable during installation.


